February 21, 2023
One key to horse training is that it’s better to prevent problems than correct them.
So, always test a new horse’s knowledge of tying before fastening her to something. The testing location should be quiet and secure.
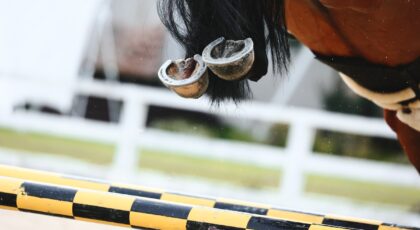
An ideal tie ring or rail is located at the height of a horse’s eye or above. Rings set near or below the horse’s nose will cause pressure on her very sensitive poll if she lifts her head and accidentally tightens the rope. That pressure causes pain that frightens the horse into pulling away. The harder she pulls, the stronger the pressure and pain, creating a vicious circle.
Many locations are too low for Tying 101. You know those low hitching posts in Western movies? In real life, they weren’t made for tying. They were made to hang or loop bridle reins on—untied—so that the horse doesn’t step on her reins and rip her mouth up. Today we use halters instead, for much greater safety.
Low hitching posts were also made for short horses and ponies. Now that many peoplework with drafts, warmbloods, and Thoroughbreds, tying heights must be raised.
Tie rings or posts should be able to withstand the sudden pull of a 1200-pound muscle-bound beast. The strength of the tie ring prevents the horse from getting away or pulling your barn down, but it also protects the horse from a much worse event: Supports that are lighter in weight or moveable—like gates, stall doors, or poorly set fence posts—can come off but remain attached to the horse’s lead, beating her as she runs to try to get away.
Quick-release snaps? My experience is that they often don’t release when they should. And most people fasten them backwards, so that they could release from the tie support but not from the halter. Again, the horse attempts to flee from the long ties that are now beating against her sides. Not a pretty picture. (Just so you know, the odd-looking round end attaches to the halter. The standardsnap attaches to the tie post or ring in the wall.)
One thing I do like to use is a leather halter. Leather breaks under duress, often saving a horse from serious injury. It’s also wide, lending comfort to the horse. Narrow equipment—whether rope halters, thin bits, slim whips—is more harsh than wide equipment. Narrow rope halters with knots positioned along the cheeks, nose, and/or poll are especially harsh. With any young or new horse, try the softest equipment first. Then move to something less lenient only if you must.
Because my three-year-old Dutch Warmblood True was raised by a responsible breeder, chances are good that he’s learned to single-tie.
But only True knows for sure! So, to test his experience, I slip his lead through a high iron ring sunk into a major support beam that’s buried in concrete deep underground. At first, I leave the lead untied and exert gentle pressure on it from many directions. I continue this for a few days in different locations. Throughout all this testing, he remains calm and doesn’t try to evade the pressure, so on about the third day I tie the lead lightly, using a loose bow knot that can be released with one easy pull. Then I stay near him, grooming and talking, making sure he is comfortable.
He proves to me over a week that he knows how to tie. Next time, we’ll talk about teaching a baby to cross-tie. Have fun out there, but be careful too!
Related reading:
Brain-Based Horsemanship is a weekly column that chronicles Janet Jones, PhD, and her journey with True, a Dutch Warmblood she trained from age three using neuroscience best practices. Read more about brain-based training in Jones’ award winning book Horse Brain, Human Brain.
This story originally appeared on janet-jones.com and is reprinted here with permission.